
Stereoscopic 3D Video Rig
I have access to two identical Flip Video camcorders.
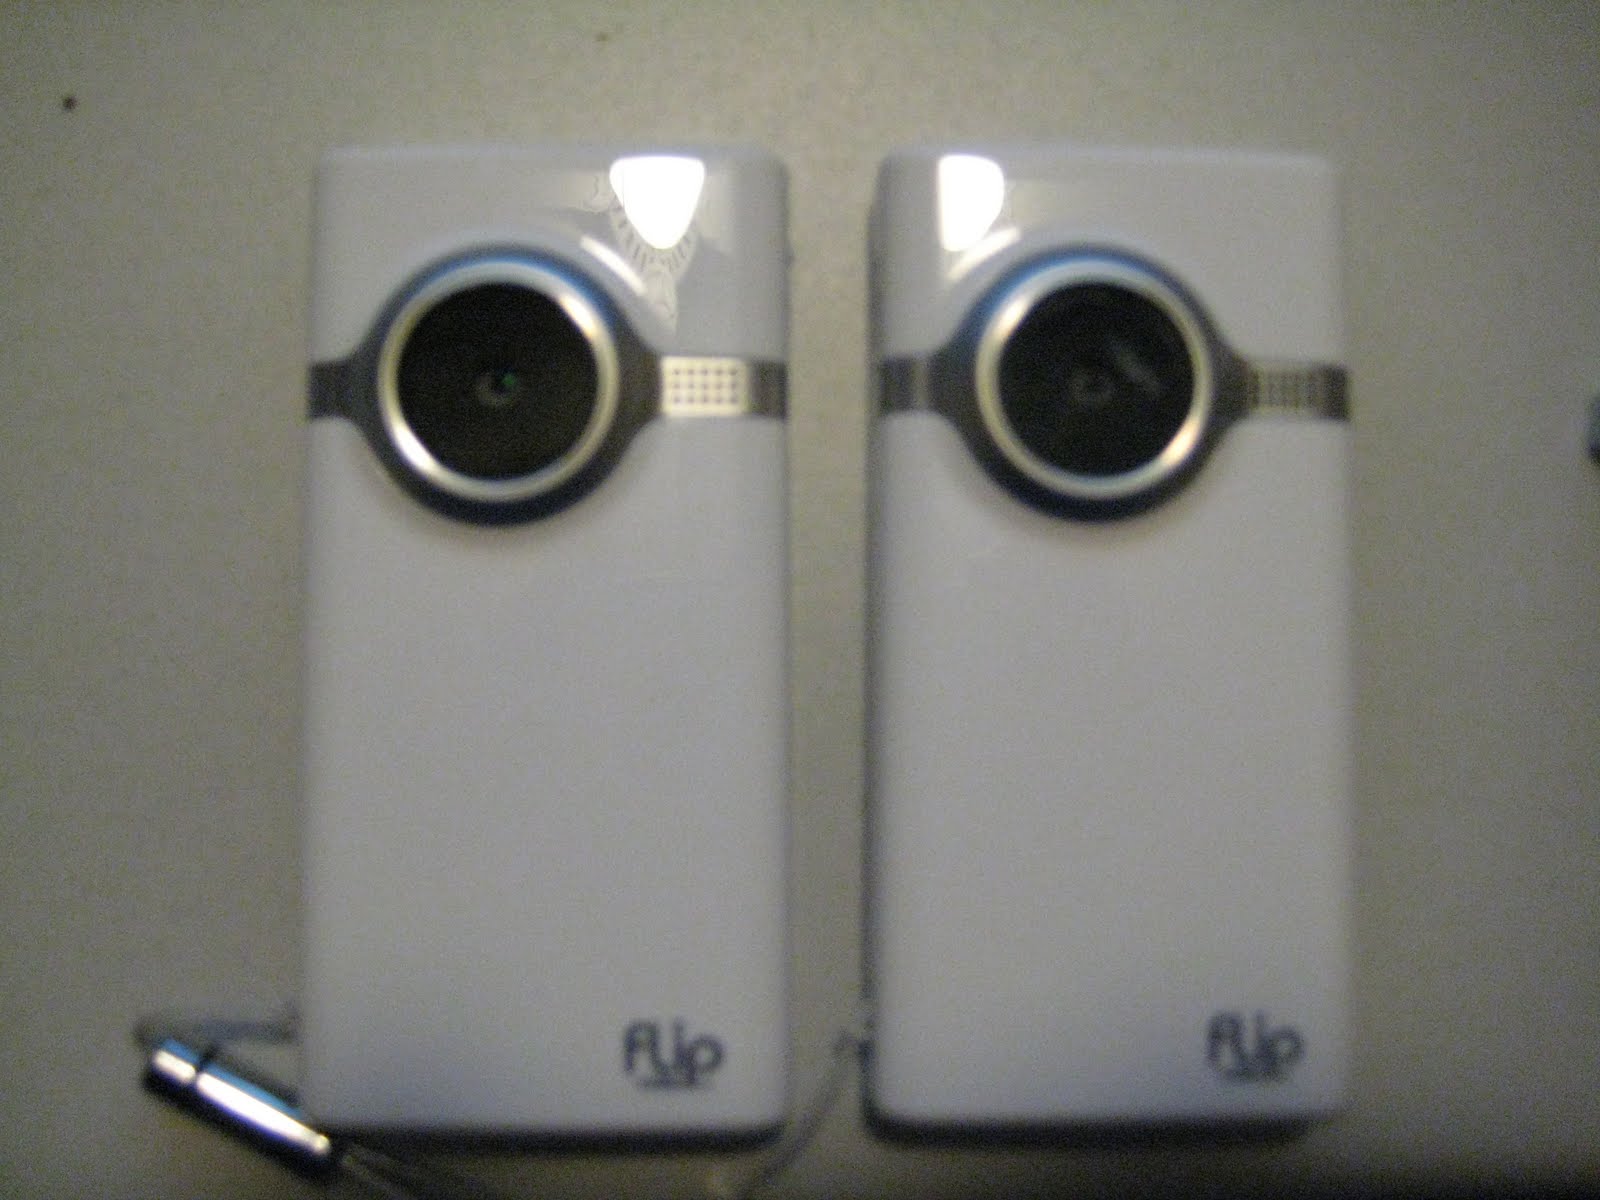
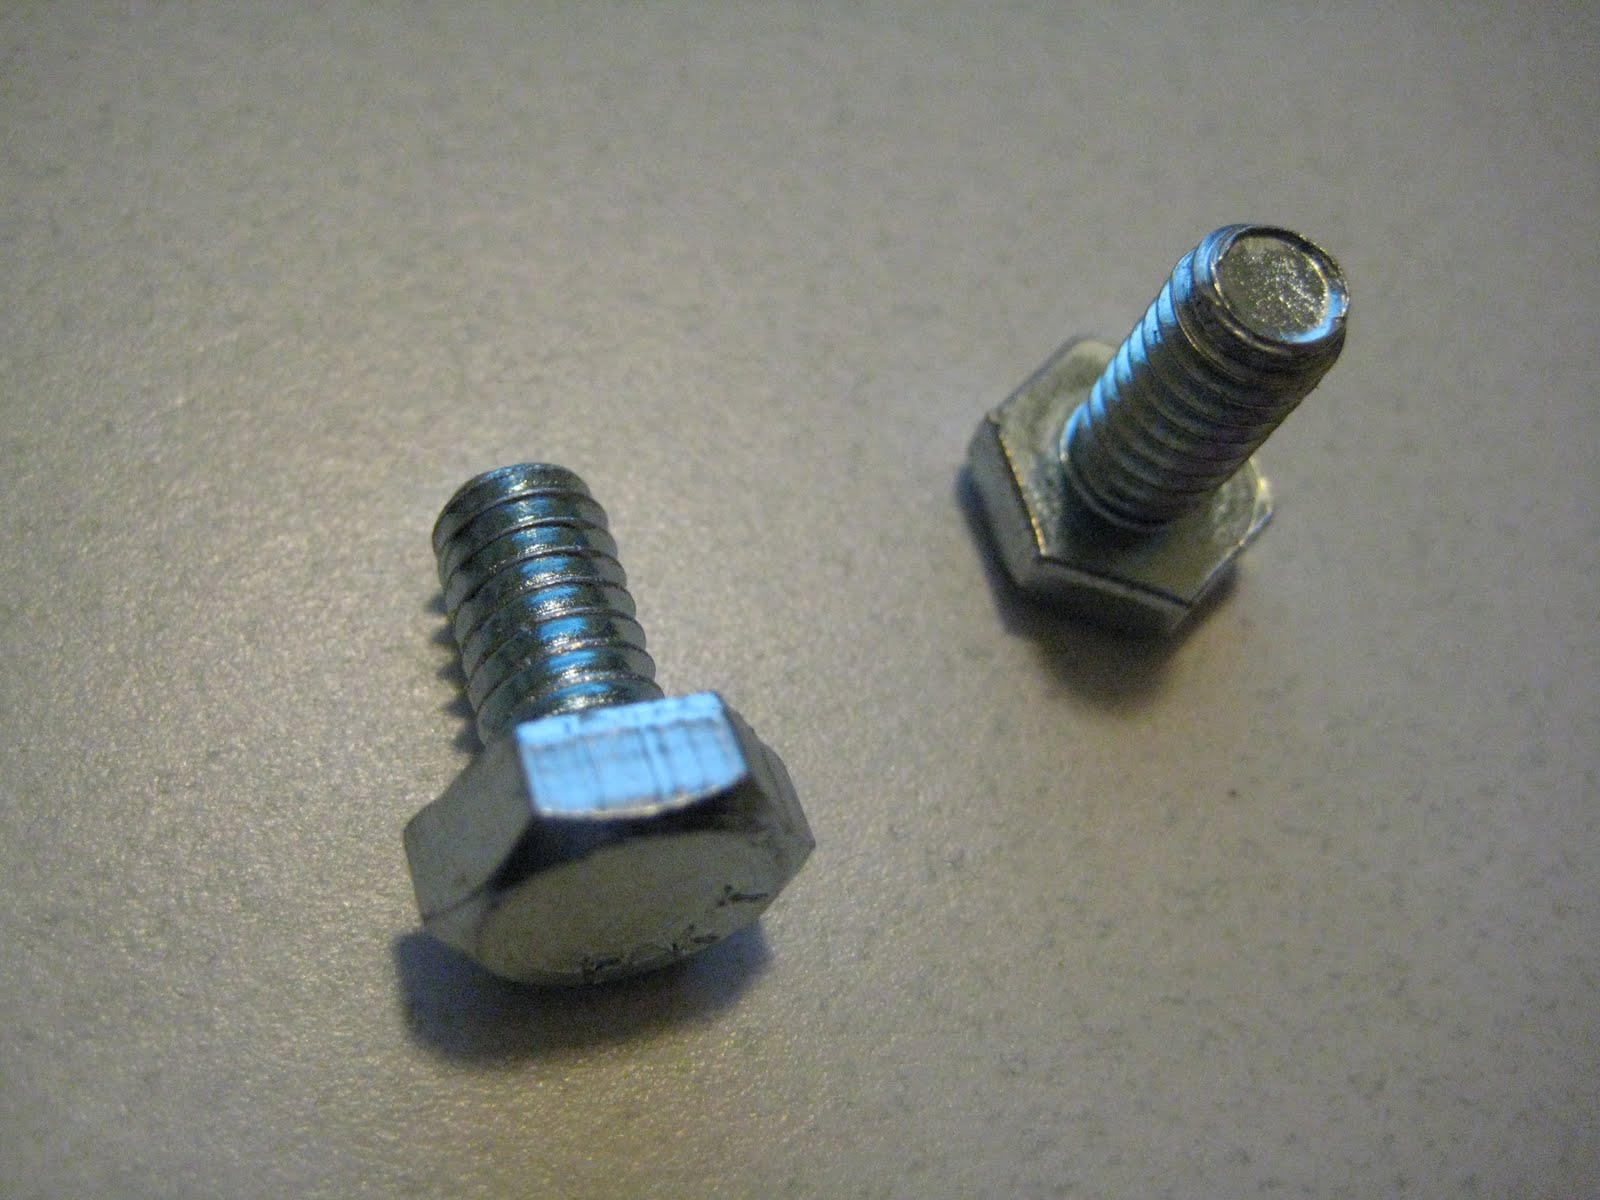
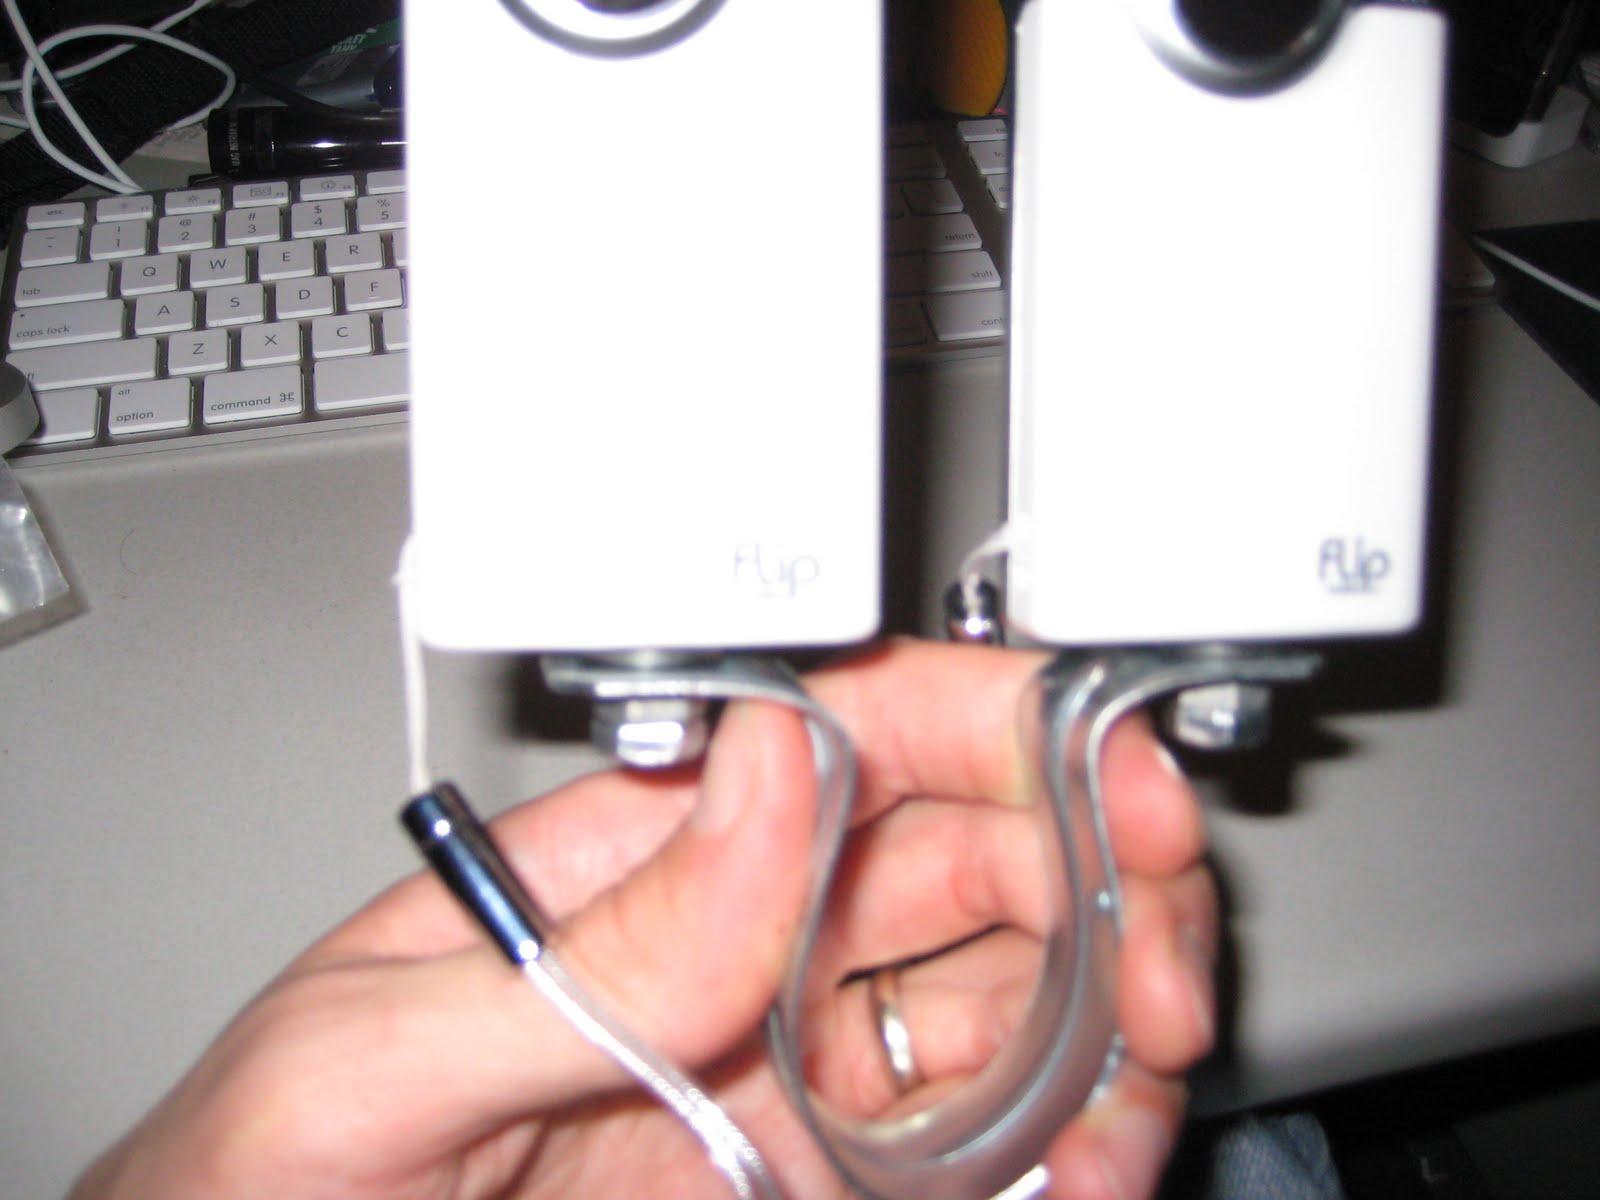
I built a cheap $3 mounting bracket system so I could use them to shoot stereoscopic 3D video. I used two 1/4” X 20 screws (these fit the tripod mount on the cameras) and a couple of nuts and washers.
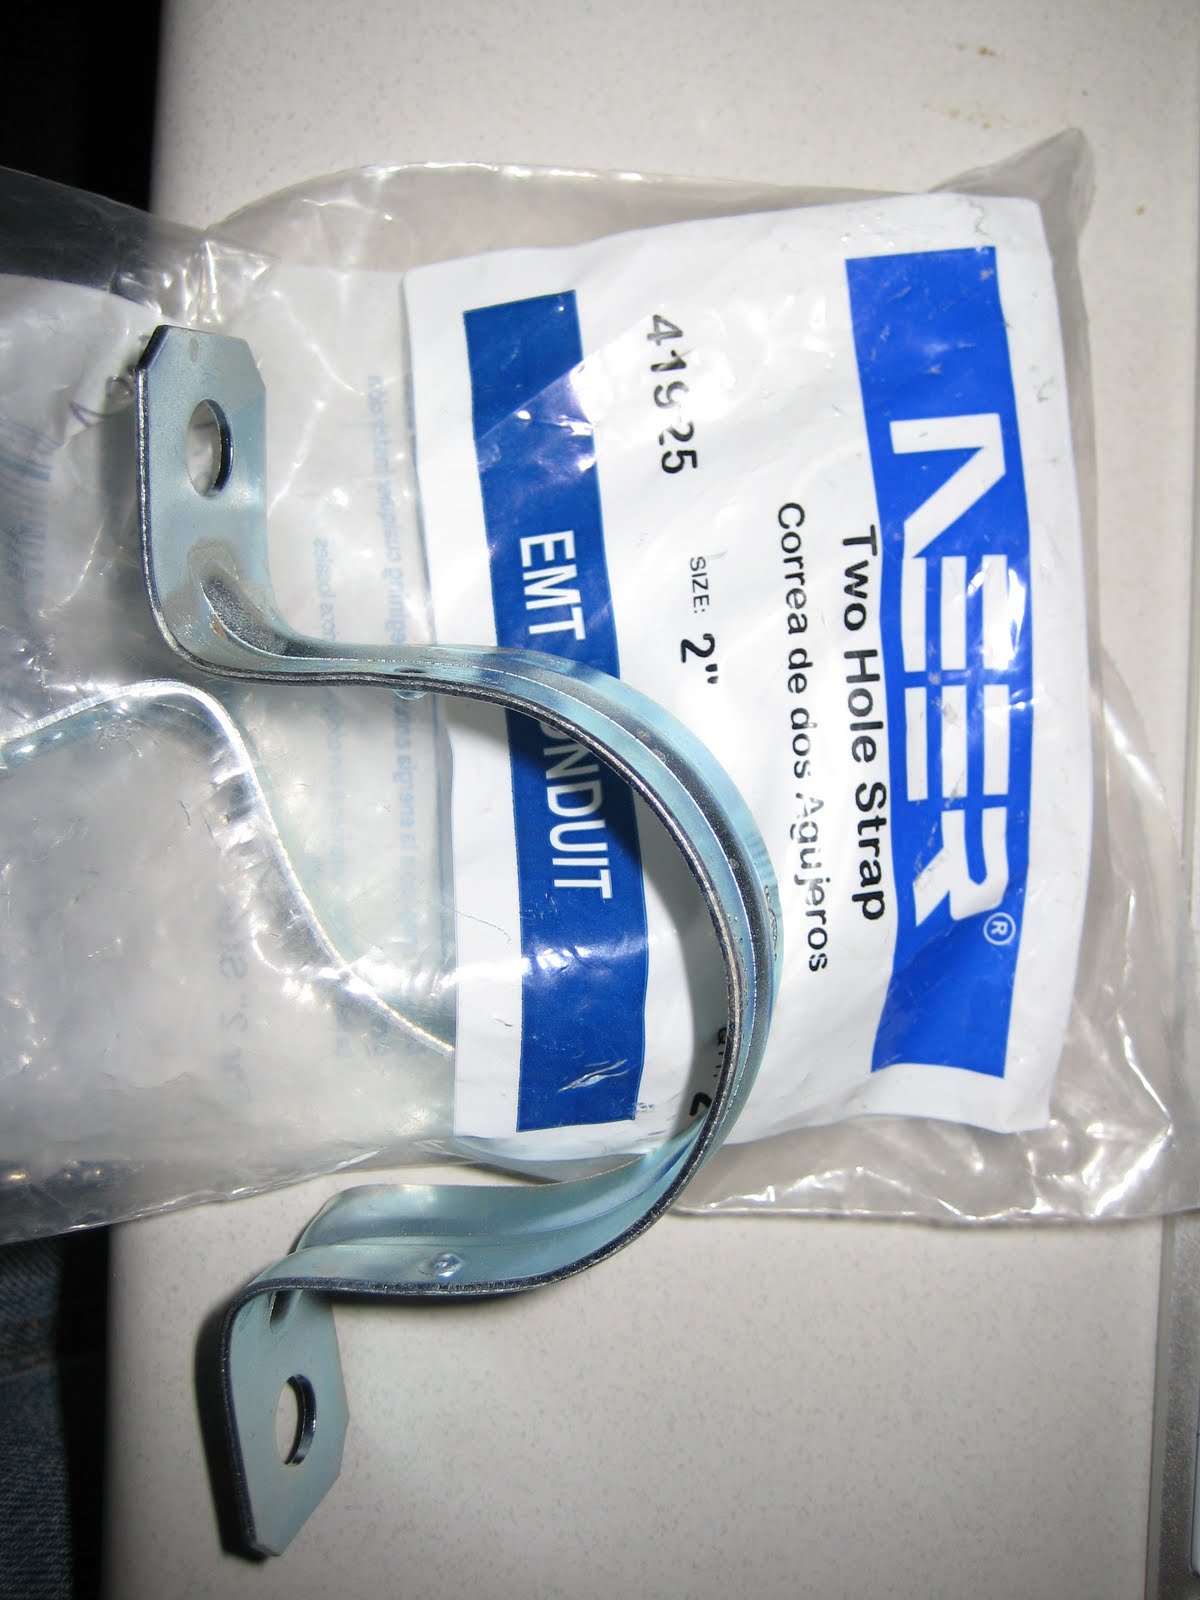
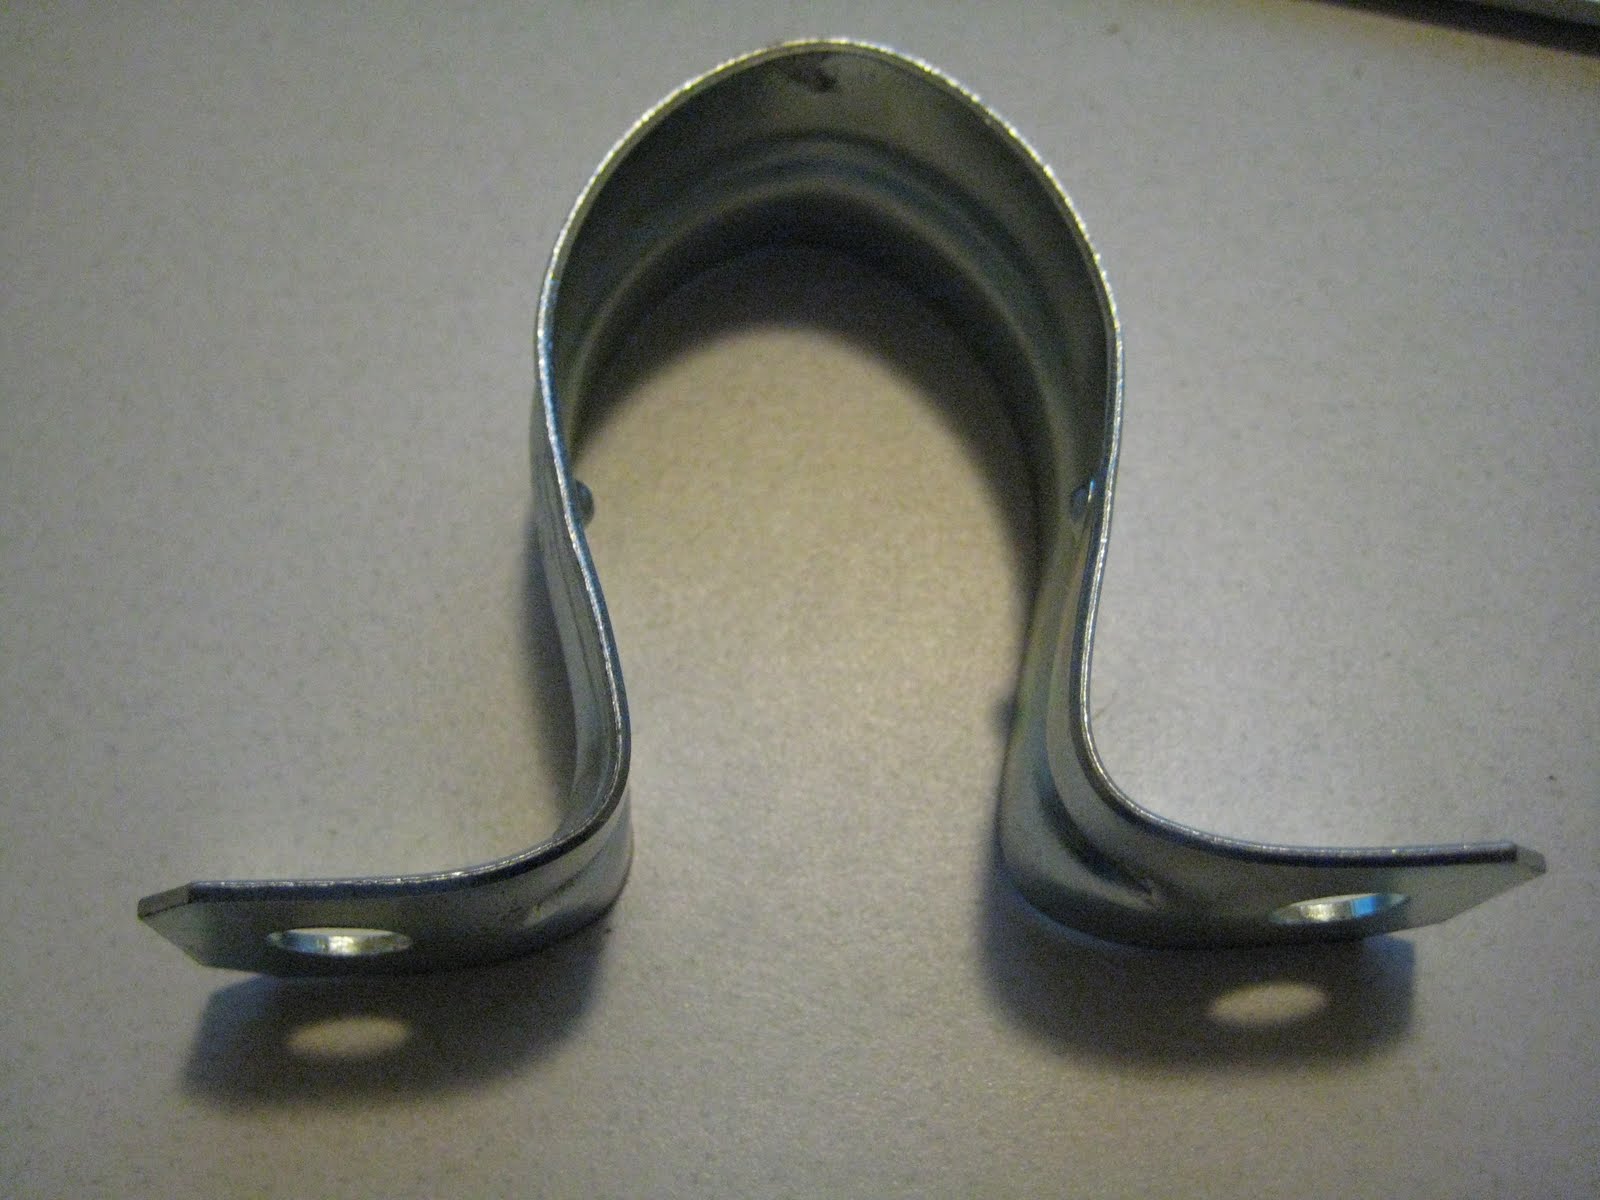
Also a bracket, I used some plumbing bracket. It was too large so I had to squeeze it smaller. You want the distance between the camera lenses to be about 6.5cm once they are screwed onto the bracket.
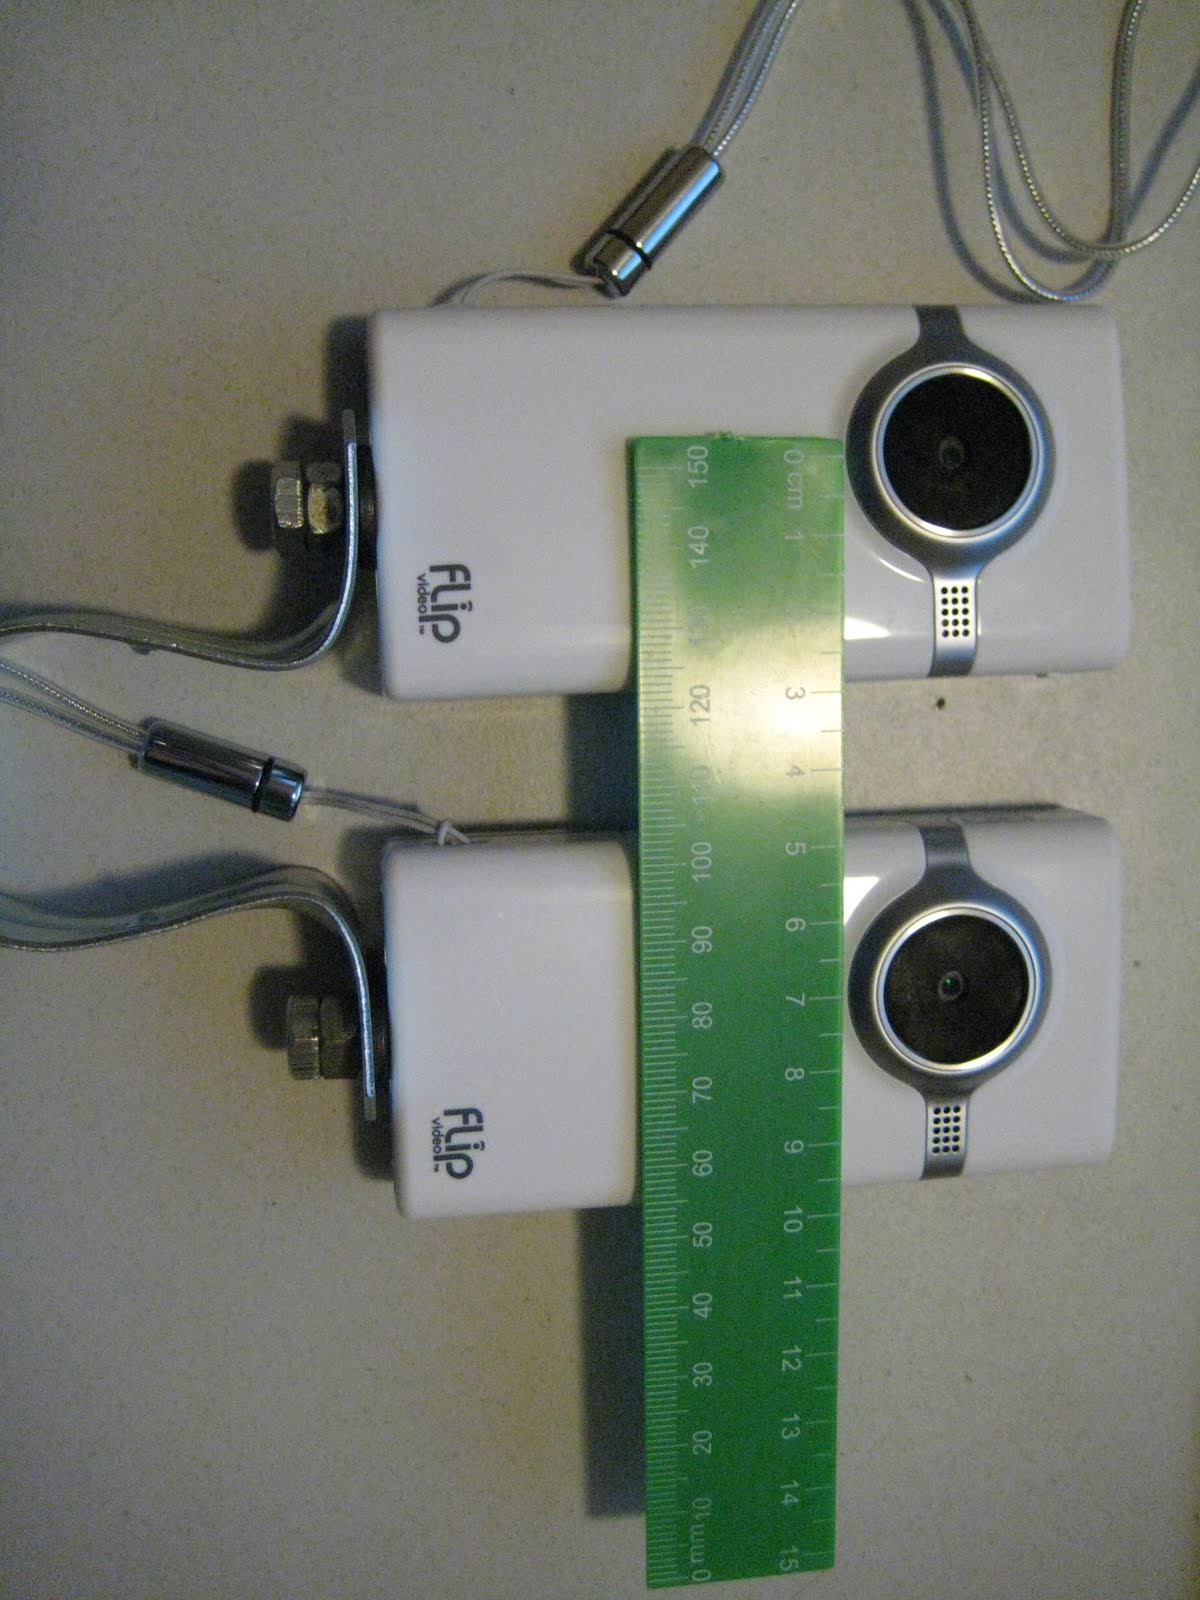
So the result looks like this.
When you shoot video, try to start both cameras at the same time. After shooting, you can use QuickTime 7 Pro to edit the videos, you will need Perian on Mac to handle the Flip DiVX AVIs. Trim each video so they start at the same time (use a clap board or something so you have a visual event to synchronize on) - use Edit |
Trim to Selection in QuickTime. Open a new empty QuickTime movie (File |
New Player), Edit |
Select All and Copy the trimmed video from the Left camera and choose Edit |
Add to Movie in the new movie. Choose Window |
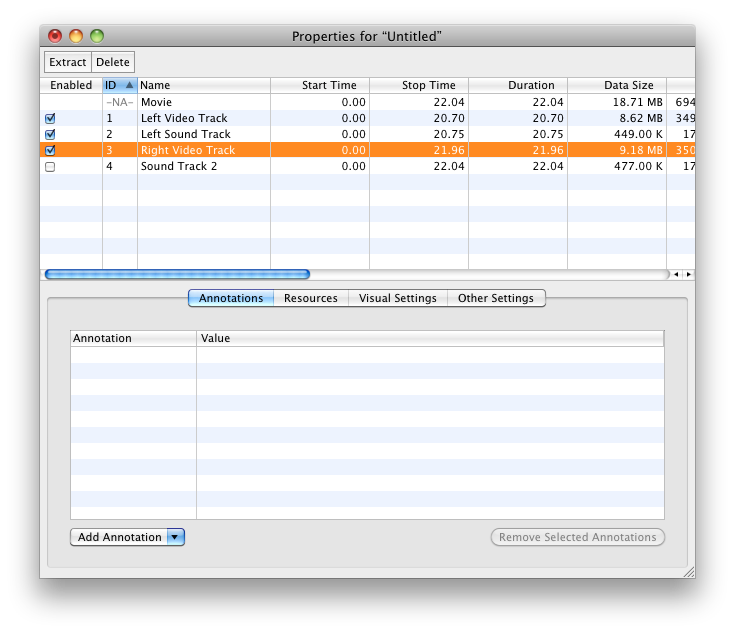
Show Movie Properties in the new movie and rename the audio and video tracks to Left Sound Track and Left Video Track. Now Edit |
Select All and Copy the trimmed video from the Right camera, move the playhead back to time zero in the new movie and choose Edit |
Add to Movie. |
You will now have two sound tracks and two video tracks in the new movie. Rename the new video track to Right Video Track and disable the new sound track.
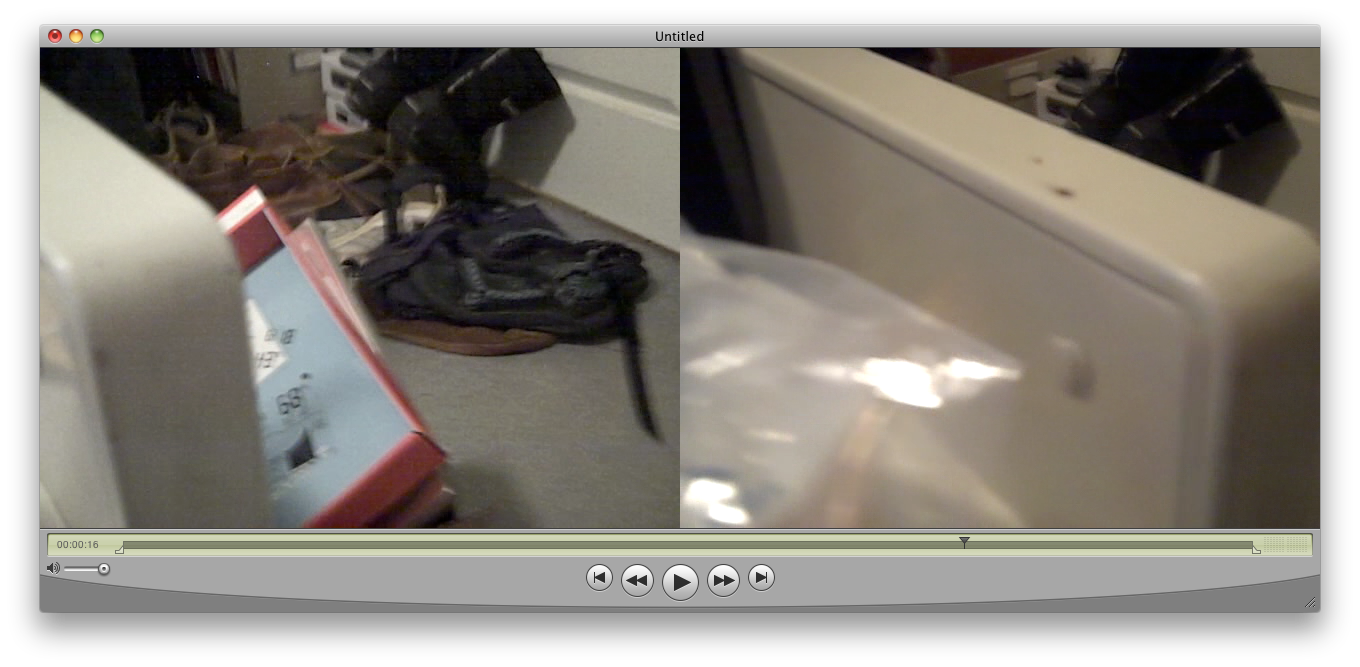
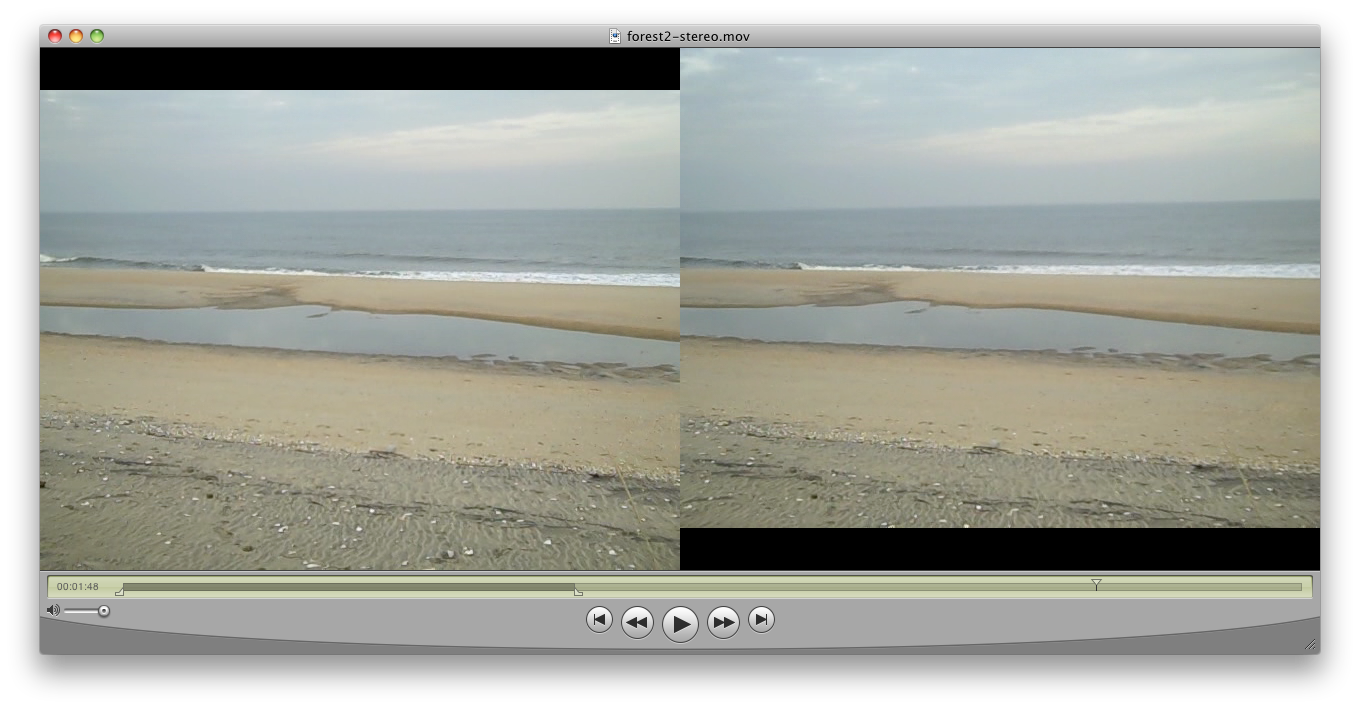
Following YouTubes guidelines, we want the Left camera on the right and the Right camera on the left. Select the Left Video Track in the movie properties for the new movie, click the Visual Settings tab and uncheck Preserve Aspect Ratio and enter 640 for the first Offset value (this is the X offset). This shifts the Left video track to the right of the Right video track. You should see the videos side by side now, Left on the right and Right on the left.

You can Save as a reference movie to avoid losing your work. Then File |
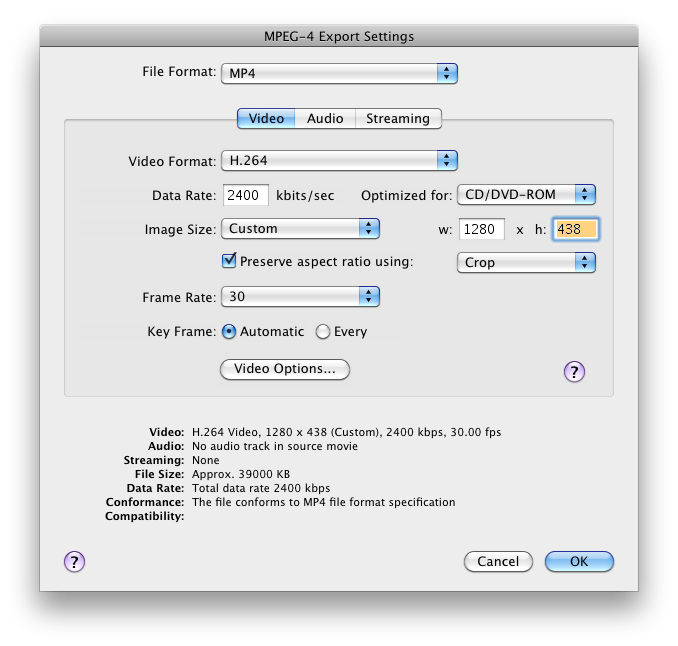
Export... and export as MP4 with H.264/AAC for upload to YouTube. On YouTube tag your video with yt3d:enable=true to enable the 3D player. |
To view your video in 3D you need a mirror, or some 3D glasses, or use the freestanding cross-eyed technique. See YouTubes viewing guidelines for further instructions on how to view the 3D effect.
Here’s my first attempt.
Update: It turns out that even when the cameras are perfectly aligned vertically, there is some internal vertical alignment difference. You can see then when I put the cameras side by side on a table - the bezel of the monitor is at a different vertical position in the images:

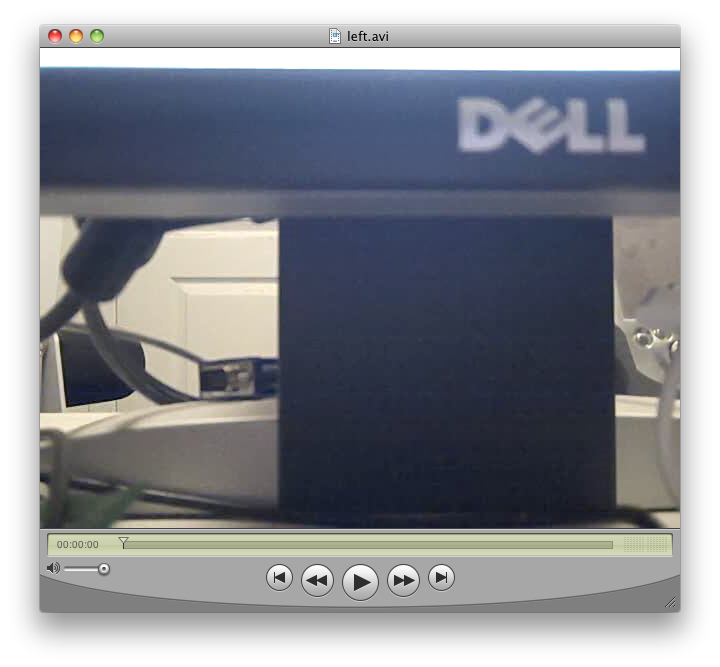
In my case the difference is 42 pixels. This can be corrected for by offsetting the video track vertically in the QuickTime track properties. You can determine the amount of offset by flipping one of the tracks horizontally (mirror) so you can align a horizontal feature in the video. When you export to MP4 you can set the vertical size to compensate for the vertical offset (in this case 480-42=438) and set it to crop - QuickTime will crop from the center removing the top and bottom 42 pixel borders.
I shot a few more sample videos, adjusting the vertical alignment, with much better results. See part 1 and part 2
Update 2 See new post with updated rig and steadicam