Tethering
In iOS when you enable the Personal Hotspot, it creates a separate bridge100 interface. So your tethered traffic goes out over this interface instead of the one your device traffic uses. So it counts against your tethered traffic instead of device traffic.
There is a way to make the tethered traffic use the same outbound interface that device traffic uses. This is a walk-through of how to do that.
First, install a-shell on iOS. Run it and enter pip install pvpn (see pvpn).
Then enter pvpn -wg 9000. You should see something like this: 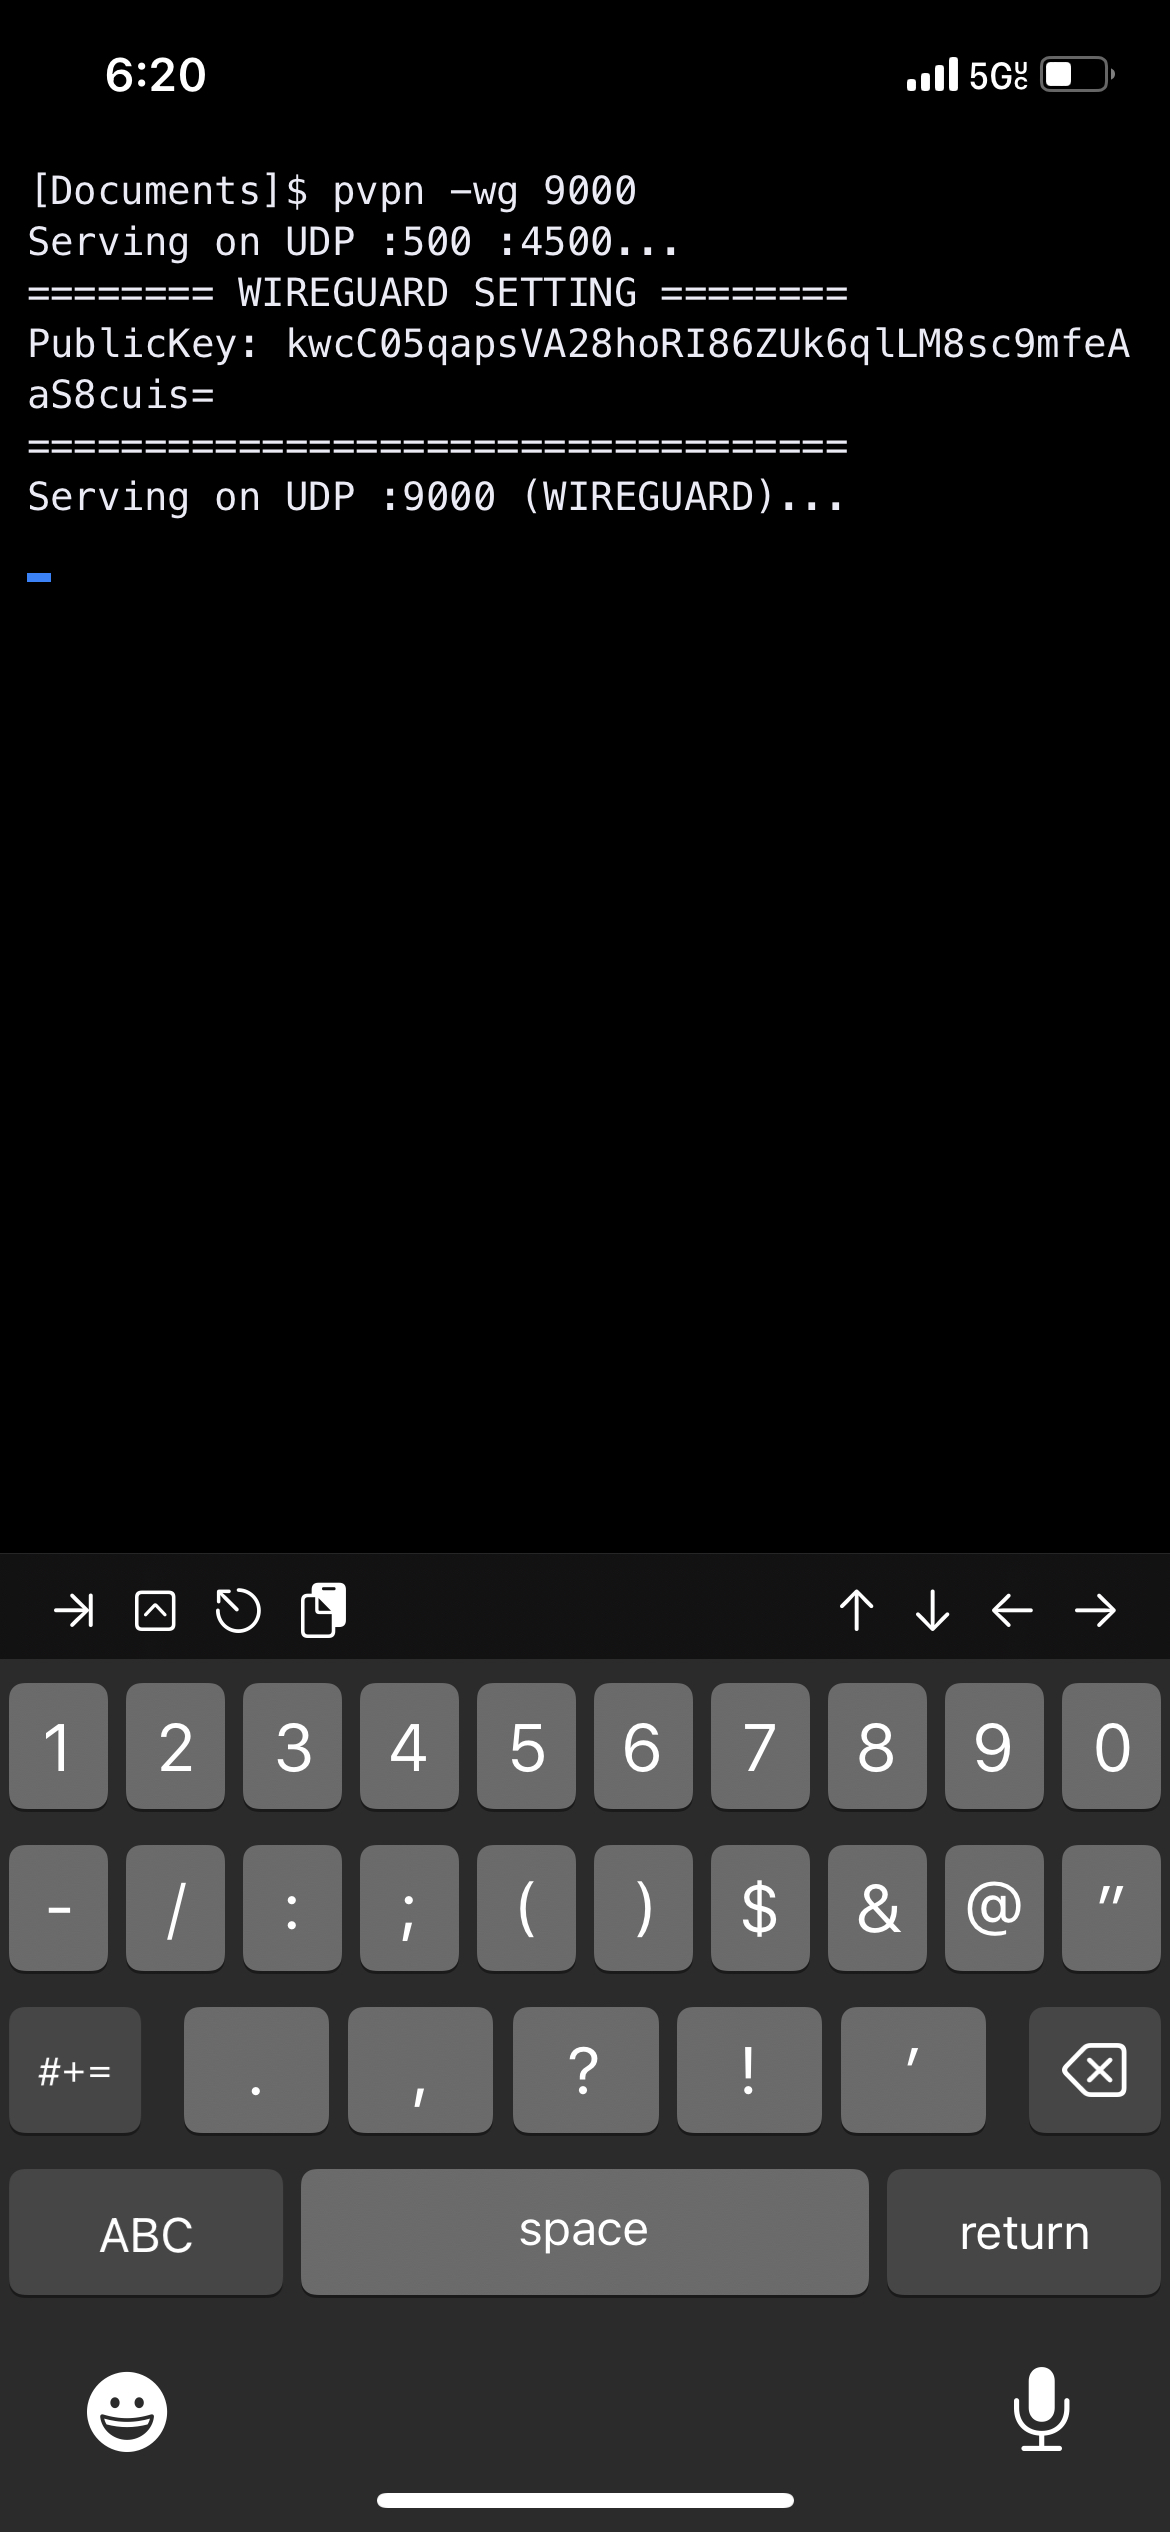 Copy the
 PublicKey it prints.
Next install the macOS WireGuard client
Choose Add Empty Tunnel…, name it pvpn and configure similar to this, where [Peer] PublicKey is the key the server printed above: 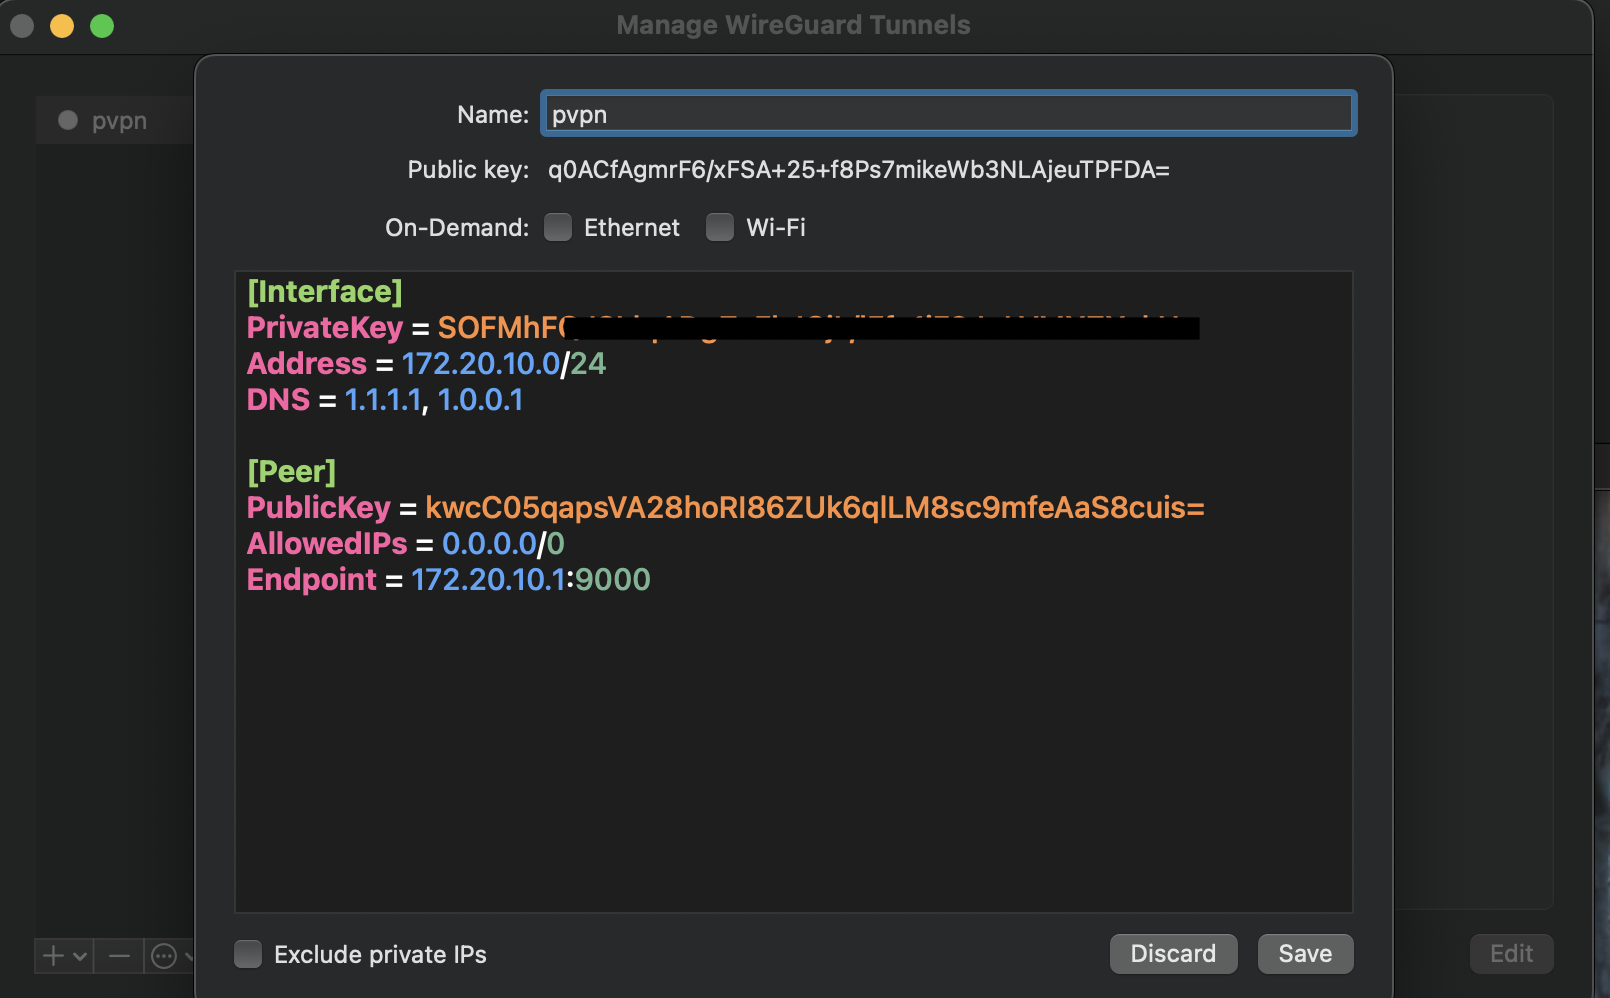
Activate the WireGuard tunnel while you are tethered to the iOS Personal Hotspot, and macOS traffic should now be routed over the VPN running on the iOS device.
You can confirm both the iOS device and the macOS client have the same public IP by visiting http://ifconfig.co/ in...